
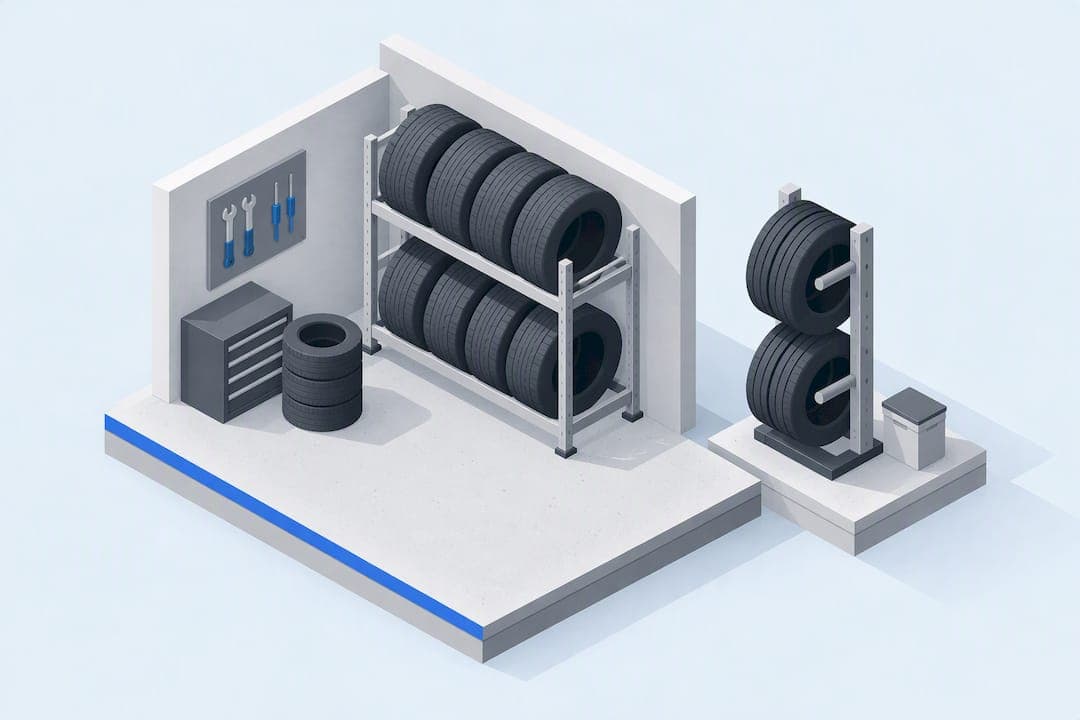
The safest routine for seasonal tires is to clean them, label them, and keep them off the ground, either on a purpose-built rack at home or in a climate-controlled unit if your garage can't offer dry, stable conditions. Set correct inflation before storing, follow a first-in-first-out rotation, and check each tire's age and condition before it goes back on your car.
TL;DR:
- Wash and fully dry each tire, label its position and storage date, set mounted tires near placard pressure, and use breathable rather than sealed covers.
- Choose a rack rated for at least 25% more than the set’s weight, measure the widest tire, and anchor wall units directly to studs.
- For a stored vehicle, inflate tires to manufacturer specifications, place foam board beneath them, and move the car periodically to limit flat spots.
- Store loose tires upright or in low sidewall to sidewall stacks, then inspect for cracks, bulges, debris, and safe tread before remounting.
- Choose indoor, dry storage away from sunlight, heat, petroleum products, and ozone sources; climate control is most useful where humidity or temperatures fluctuate.
Table of Contents
- Practical storage methods: racks, wall mounts, shelving, and tire totes
- DIY vs ready-made rack products: what specs to check and installation notes
- Preparing tires for storage: cleaning, labeling, inflation, and packaging
- Mounted versus unmounted storage: orientation, movement, and inspection routine
- When to choose commercial storage and how to evaluate a storage facility
- Handling and storage safety tips to prevent tire degradation
- Recommendations for organizing multiple sets of tires
- Environmental considerations specific to tire storage
- Why secure, contactless storage is often the simplest option
- Inline Storage: unit sizes and features for tire storage
- FAQ
- Sources
Practical storage methods: racks, wall mounts, shelving, and tire totes
Picking the right method mostly comes down to how much floor space you have and how many tires you're storing. A single set of four fits almost anywhere; two or three sets of seasonal tires need a more deliberate setup.
Floor-standing, multi-tier shelving is the most common choice for garages with room to spare. These racks typically hold three or four shelves and are rated to carry the weight of a full tire set without sagging or tipping. Because they sit on the floor, they need a clear footprint, usually around 3 to 4 feet wide and 1.5 feet deep, but they scale well if you're storing tires for more than one vehicle.
Wall-mounted folding racks solve the footprint problem. These units attach to studs and fold flat against the wall when not in use, which matters in a one-car garage where every square foot counts. Models like the 01031 TireLoft storage unit telescope to fit different stud spacings, and the design keeps tires elevated and clear of moisture on the floor.
Tire totes and breathable covers add a layer of cleanliness and protection regardless of which rack or shelf you choose. A tote keeps dust and rodents away, while a cover blocks direct sunlight, which matters because ultraviolet exposure degrades rubber over time. Covers also help limit contact with airborne contaminants that accelerate aging.
Pallets or raised platforms work when a rack isn't practical, such as in a shed or an outdoor storage area. The goal is simply to get tires off a concrete floor or bare ground, since direct contact with concrete can draw moisture into the rubber and contribute to cracking over a long storage period. A few inches of clearance from a pallet or thick wood boards is usually enough.
- Floor shelving suits larger tire collections and offers the best value per tire stored.
- Wall-mounted folding racks preserve floor space in tight garages.
- Tire totes and covers protect against dust, sunlight, and pests.
- Pallets or raised platforms keep tires off damp or bare floors when racks aren't an option.
Whichever method you choose, the underlying principle from the Tire Industry Service Bulletin is the same: store tires indoors, in a clean, dry space with minimal circulating air, and keep them raised off the surface they're resting on.
DIY vs ready-made rack products: what specs to check and installation notes
Before you buy or build anything, match the rack's specs to what you're actually storing. A set of compact car tires has very different space and weight needs than light truck tires, and guessing at capacity is how racks fail.
Start with these specs:
- Load capacity: confirm the rack is rated for your total tire weight, not just one tire.
- Shelf depth and width: measure your widest tire's diameter and width before buying.
- Adjustability: look for shelves or beams that move to fit different tire sizes.
- Anchoring method: check whether the unit bolts to studs, the floor, or both.
Product examples give a useful sense of scale. Wall-mounted folding units commonly telescope between about 34 and 58 inches to fit varying stud spacing, while floor-standing shelving usually comes in three or four tiers. On the heavier-duty end, industrial multi-tier racks are built to hold 27 to 36 passenger tires with adjustable beams that move in 1-inch increments, and some four-tier models carry up to 2,000 pounds. Three-tier versions are lighter-duty, rated closer to 500 pounds and sized for around 27 tires.
Installation details matter as much as the rack itself. Wall-mounted units need to hit studs, not just drywall, since a tire set is heavy enough to tear out an anchor that isn't seated in framing. Floor racks benefit from anchoring to the slab if they're tall or narrow, since a top-heavy rack can tip when you're loading or unloading tires. If you're placing two racks back-to-back to save space, check that both are stable independently before you load them, since leaning one against the other isn't a substitute for proper anchoring.
Many retail racks also include angled beams, typically set at roughly 45 degrees, designed to cradle the tread and keep tires from rolling forward off the shelf. That's a detail worth checking if you're comparing a basic flat-shelf unit against one built specifically for tires.
Pro Tip: Buy a rack rated for at least 25% more weight than your current tire set, since larger replacement tires or an extra set down the road can push you past a rack's limit faster than you'd expect.
As for DIY versus prefab, a well-built DIY shelf can work fine for light loads, but prefab racks come with tested load ratings and, often, a warranty that covers failure under normal use. If you're storing more than one set of tires, or tires for more than one vehicle, a tested product removes the guesswork. DIY shelving makes more sense for a single, light set of compact tires where the stakes of a miscalculation are lower.
Preparing tires for storage: cleaning, labeling, inflation, and packaging
What you do before tires go into storage matters more than where they end up sitting. A few simple steps protect the rubber and save you from guessing later which tire goes where.
- Wash off salt, brake dust, and road chemicals, then let tires dry completely before storing them. Trapped moisture against rubber contributes to deterioration over a long storage period, and the Tire Industry Service Bulletin specifically calls for clean, dry conditions.
- Label each tire with its wheel position and the month and year it went into storage. This makes first-in-first-out rotation simple and prevents you from accidentally running an older set past its usable life.
- Set the right inflation before storing. For tires already mounted on wheels, keep them close to the pressure on your vehicle's door placard; some technicians recommend a slightly higher temporary pressure for tires that will sit unused for several months, then rechecking pressure once they're back in service, per AAA's cold-weather guidance on pressure loss in cold temperatures.
- Choose breathable storage over sealed plastic. A breathable bag or cover protects against dust and sunlight without trapping humidity the way a fully sealed bag can. Avoid letting tires sit against petroleum products, solvents, or anything emitting fumes, and skip airtight steam-box style covers that prevent any air exchange.
These four steps take maybe twenty minutes per set, and they're the difference between pulling out tires that are ready to mount and discovering a problem the day you need them.
Mounted versus unmounted storage: orientation, movement, and inspection routine
Tires still mounted on a vehicle need different handling than a loose set sitting in your garage. If you're storing a car for the season, AAA recommends inflating tires to the manufacturer's spec and parking on foam board squares, which helps prevent flat spots from the vehicle sitting in one place too long. Moving the vehicle periodically, roughly every three months, also helps redistribute weight and avoid those flat spots setting in permanently.
Unmounted tires follow different rules. The Tire Industry Service Bulletin recommends storing them either sidewall-to-sidewall in a stack or upright, tread-up, on a rack. Stacking flat is fine for shorter periods, but keep stacks reasonably low since excessive weight on the bottom tires can distort their shape over months of storage.
- Mounted tires: inflate to placard pressure, use foam board under tires, move the vehicle periodically.
- Unmounted tires: stack sidewall-to-sidewall or store upright on a rack, and avoid overly tall stacks.
- Tires stored for several years benefit from a full inspection before remounting, since age affects rubber condition independent of tread wear.
- Check each tire visually and by touch for sidewall cracking, bulges, or embedded debris, and confirm tread depth meets a safe minimum before mounting.
A quick inspection routine before any tire goes back on a vehicle takes just a few minutes and catches problems that storage alone can't prevent.
When to choose commercial storage and how to evaluate a storage facility
Home storage isn't always realistic. If your garage is full, you don't have covered parking, or you simply want a hands-off seasonal swap without finding space in your own house, an off-site storage service solves the problem directly.
When evaluating a facility, prioritize features that protect tires specifically:
- Indoor, climate-controlled units limit temperature swings and humidity that accelerate rubber aging.
- Surveillance and gated access matter if you're storing tires alongside wheels or other valuable gear.
- Drive-up access makes seasonal swaps faster since you're not hauling tires through a hallway or elevator.
- Ask whether the facility offers any form of inventory tracking or dedicated racking, which keeps multiple sets organized if you're storing tires for more than one vehicle.
Cost depends mainly on unit size, whether you add climate control, and whether you want any pickup or drop-off service. Before signing anything, ask about access hours, what insurance covers your stored items, and how the facility handles tires specifically, since not every unit type is suited to rubber and wheels sitting for months at a time.
For sizing, a single household's tire set plus a few boxes of seasonal gear usually fits in a small to mid-size unit, while multiple vehicles or additional equipment call for something larger. Climate control is worth the added cost in regions with heavy humidity or temperature swings, since both accelerate the kind of degradation unmounted tires are prone to.
Handling and storage safety tips to prevent tire degradation
How you handle tires on the way into storage affects how well they hold up. Avoid dragging tires across concrete or asphalt, since that can abrade the sidewall and introduce small cuts that worsen over time. Lift tires rather than rolling them over debris, gravel, or sharp edges in a garage or storage unit.

Keep tires away from direct heat sources like space heaters, furnaces, or sun-exposed windows, since heat accelerates the chemical breakdown of rubber compounds. Avoid storing tires near anything leaking oil, gasoline, or solvents, since petroleum products degrade rubber on contact.
If tires are stacked, rotate the stack occasionally rather than leaving the same tire on the bottom for the entire storage period. This spreads out the weight-bearing load and reduces the chance of one tire developing a lasting deformation. Finally, keep the storage area dry. Standing water or persistent dampness around stored tires, even without direct contact, raises humidity levels that contribute to long-term material breakdown.
Recommendations for organizing multiple sets of tires
Once you're storing tires for more than one vehicle, or summer and winter sets for the same car, organization becomes the difference between an easy seasonal swap and a frustrating search through your garage.
Label every tire clearly with the vehicle it belongs to, the wheel position, and the date it went into storage. Color-coded tags or zip ties work well if you're managing multiple sets at once. Group each set together on its own rack shelf or tote rather than mixing tires from different vehicles, since this makes the handoff at swap time much faster.
If you're using a multi-tier rack, consider dedicating a full shelf to each vehicle's set rather than splitting tires across shelves. This keeps the first-in-first-out rotation simple and makes it obvious when one set is due for inspection before the others. For households with three or more sets, a dedicated storage unit with built-in or added racking keeps everything organized in one place without crowding a home garage.
Environmental considerations specific to tire storage
Two environmental factors do more damage to stored tires than almost anything else: ultraviolet light and ozone exposure. Direct sunlight breaks down the rubber compounds in a tire's sidewall over time, which is why indoor storage, or at minimum a breathable cover, matters even for short storage periods.
Ozone exposure is less obvious but just as damaging. According to guidance from Knape & Vogt, ozone-generating sources like electric motors, battery chargers, and compressors accelerate sidewall cracking even when tires are kept in a dark garage. It's worth scanning your storage area for anything within 10 to 15 feet that generates ozone and moving your tires further away if needed.
Humidity and temperature swings round out the main environmental risks. A damp basement or an uninsulated shed that swings between extreme heat and cold puts more stress on stored rubber than a stable, dry, climate-controlled space.

Why secure, contactless storage is often the simplest option
When a garage isn't an option, the friction of seasonal tire storage usually comes down to access and trust: can you get to your tires easily, and are they actually safe while you're not looking at them. A contactless rental system and round-the-clock surveillance address both of those concerns directly, which is why off-site storage works well for readers without a dry, climate-stable garage.
Off-site storage makes the most sense when you don't have reliable indoor space, want tires protected from temperature swings, or just want an easy seasonal pickup and drop-off without rearranging your own garage.
— Ian
Inline Storage: unit sizes and features for tire storage
Our storage units can be reserved online, allowing you to pick up your access code without waiting in line, which helps if you're swapping tires on a tight schedule between seasons. For most households storing one or two sets of tires plus some extra gear, a 10x10 storage unit offers enough room without paying for unused space, and a 10x15 unit fits comfortably if you're storing tires for multiple vehicles. Climate-controlled storage is worth adding if you're storing tires for more than a few months, since it limits the humidity and temperature swings that accelerate rubber aging.

- 10x10 and 10x15 units sized for one or two vehicles' worth of seasonal tires.
- Climate-controlled options to protect rubber from heat and humidity swings.
- Video surveillance and drive-up access for straightforward, secure pickup and drop-off.
- Online reservations and access without an in-person visit.
Check unit availability and reserve online at our South San Antonio self-storage location.
FAQ
What is the best way to store winter tires?
The best approach is to clean and dry winter tires, label them with the date and position, and store them off the ground, either on a rack or in a breathable tote, in a clean, dry, indoor space according to the Tire Industry Service Bulletin. If you lack suitable indoor space at home, a climate-controlled storage unit protects against the temperature and humidity swings that speed up rubber aging.
What is the 3% rule for tires?
There's no standard "3% rule" documented in current tire industry storage guidance, and definitions of this term vary online. The guidance that is consistently recommended by manufacturers and the Tire Industry Service Bulletin focuses instead on clean, dry, indoor storage with minimal air circulation and periodic inspection.
How much does Canadian Tire charge to store winter tires?
Canadian Tire is a Canadian retailer, and its seasonal tire storage pricing isn't part of the U.S. storage market this guide covers. If you're in the U.S. and looking for a comparable off-site option, a self-storage unit sized for your tire set, with climate control if needed, serves the same purpose.
Do tire savers really work?
Products marketed as tire savers aim to prevent flat spots on tires that sit unused for long periods, and the underlying principle, reducing prolonged pressure on one section of the tire, lines up with AAA's recommendation to use foam board under parked tires and to move a stored vehicle periodically. Results depend on how long the vehicle sits and the tire's condition going into storage, so periodic movement remains a reliable practice regardless of which product you use.
How do I know if stored tires are still safe to use?
Inspect tires stored for an extended period for sidewall cracking, bulges, or embedded debris, and check that tread depth still meets a safe minimum before mounting them. Tires stored for several years warrant a closer inspection regardless of how little tread wear they show, since age affects the rubber independent of use.
Sources
- Tire Industry Service Bulletin — U.S. Tire Manufacturers Association (TISB_23 No 5)
- 4-tier tire storage rack specifications — Martins Industries
- The Do's and Don'ts of Winter Car Storage — AAA Northeast Magazine